Not entirely idle

I am not even going to apologize for my extended blog absence.  It is my blog after all.  But I have been working on a very VERY important project that has been keeping me exceedingly busy and not doing much sewing, crafting or jewelry making since February.  Once the project is complete in early November, I will be even busier.   Yes, for those of you who worked it out, there is a baby on the way!

The first three months sucked (as they do apparently), but once the nausea wore off, I have been crocheting wash cloths, working on one of those baby announcement cross-stitch kits and I have made a top and a couple of pairs of draw-string shorts.  I had all these glorious visions of making my own maternity outfits and sewing for the baby, but that was before I realized just how much work it is to assemble one of these mini-humans!   I don’t think I have ever been so tired in my life!  So I have admittedly bought the majority of my maternity wear except for what my amazing mum has been whipping up in her sewing room for baby and I, including a dress for an up coming wedding, tops, pants and lots of crib sheets, receiving blankets and fuzzy sleepers.

The one big sewing project I have embarked on is a set of curtains for the baby’s room.  I got some cute fabric with birds on it, the black out lining and was ready to go.  I got them cut out (which took an extraordinary amount of effort), got the first hem on the first panel done and then attempted to attach the lining.  Let us just say that it is a good thing that, though baby can hear me, they can’t discern actual words, or they would be born dropping the f-bomb.  I hated everything about the panel, it was impossible to iron, the hems were bulky despite my best efforts and I am fairly sure totally crooked.  So after letting it hang up on the rod in the nursery and infuriate me for a while, I took it down, ripped out the lining and will just make the plain curtain panels and install a separate roller blind. You gotta pick your battles!

So, once those are up, I shall try to remember to update you all with some photo’s, but since embarking on the journey to motherhood, my brain seems to resemble a sieve!  I left a pair of socks in the pantry…yeah.

okay, okay okay, so it’s been a while.

I know, but it can’t be helped!   There has been much to do, and no time to blog about it.

Let’s see, since last time I blogged, I have learned a few things about sewing.  Done a fair amount of beading. Signed up for 2 Christmas craft shows in Ottawa and started my Christmas crafting.  Oh, I also made and preserved chili sauce!

So first things first. My sewing machine has been getting a lot of exercise lately.  Remember the picture of all of those items I had cut out in my last post?  Well, I finished the blouse for me, the two tops for my niece.  I haven’t gotten to the 2 aprons, (M2947 and Simplicity 2161).  Of course, I have forgotten to take pictures of everything except a couple of items.

The most challenging item by far was the blouse I made for myself, M6649.

image_7

I have never constructed a tailored blouse like this before and it involved a lot of things, like lap bands (wha?), which it turns out are the little bit that goes around the opening in the cuff.  So everything was going along fairly well, although there was a fair amount of un-stitching and re-stitching, and don’t even get me started on getting the dang button holes in a straight line.  yeesh.  However, the real issue was the cuffs, I made two beautiful perfect cuffs…and when I attached my lovely sleeves to my shirt, tried it on and…oh *insert expletive*!!!.  I had made two lovely, perfect LEFT SLEEVES!!!  sigh.  So now I have a lovely shimmery plaid 3/4 length sleeved blouse.  problem solved, lesson learned!

I finished the skirt, and the jumper that I cut out for me, and the two tops for my niece came out really well, I made princess seams for the first time, and I was actually surprised and how easily they went together for the jumper.  What really helped was my early birthday present from my mum, a sewing ham and sleeve insert.  (pics to come).  These make pressing curves a million times easier!

I have also been hard at work on Christmas presents but I can’t talk about them just yet of course 😉

The other fun thing I tried was this great mason-jar pin cushion idea i got from Pinterest.

image_5 I also made one that has elastic attached and goes around my sewing machine, which means as I pull pins from my work as I stitch I end up with fewer pins flying around my desk and ending up on the floor.

Oh Pinterest, hours and hours of fun and inspiration!

Like this little wire wrapped birds nests with glass pearl “eggs”.

image_6

I have made quite a few of these and have been selling them as Christmas tree ornaments.  These and the chainmaille balls that I originally made as pendants.

Picture 568remember these?

Anyways, I made a whole bunch in green, red and gold combinations and I am almost totally out of them after my show last Sunday (hence, no pics) .  I have ordered more rings and will try to make a bunch more before my next show on the 30th.  It is at the RA Centre in Ottawa again, and I have the same table!

Oh yeah, and I decided I wanted to try canning, so I got a canning set, cooked up a batch of Grandma MacPhail’s Chili Sauce (YUM) and VOILA!

image_1  This was so fun, I did it again last weekend and made Cranberry Orange Jelly, which will be Christmas presents.

So that’s what I have been up to since last we chatted, or rather, I chatted at you.

Back to work!

Well folks, the summer is over and so is my vacation and my slow down, things are now moving apace!  Since I last posted, I have finished a few aprons, a pair of pants,  and a tunic.  I made out like a bandit at the McCalls $.99 out of print clearance sale.  I bought about 15 patterns, some for me and some for my niece and some for aprons to make for sale.

I also cut out a number of items which I am going to start sewing this week.   I started designing for WM Bridal, the new line I am going to add to my Etsy shop.  I registered for 2 craft shows this November at the Ottawa RA Centre in the Clark Room on November 16th and 30th.

Here are the aprons I have made so far.


This is what it was supposed to look like, (far right with the scalloped edge)

New Picture

Now, as you can see, what I created is completely difference from what it is supposed to look like.  This is because the scalloped edge came out looking horrible!   So after cutting off the scalloped bit, I didn’t have a very big piece left so I took the accent green and created a gathered skirt-like piece with patches from the main fabric.  The carrot patch is a secret pocket.

The other two when MUCH better!

B5436

image_4

This one is cute, I used some sheer lacy fabric for the flounce and the ties at the back. and I am pretty happy with the results.  I can see trying the other versions on this pattern.

image_6

This one is my favourite!  It is hard to see in the picture, but the fabric is little owls, with red linen accents.  The pattern is a retro one either from Vogue or Butterick, I can’t remember, (I will add the info later when I find the pattern).


FOUND IT!

S2592 Simplicity Archives 2592!  View B.  I want to try View C next!

Those are the projects I have actually completed in the last month or so.  Here is what I have cut out that I am going to start sewing this week!

image


A Jumper, skirt and blouse for me.  A t-shirt and blouse for my niece, and three aprons for upcoming craft shows!  That should keep my Jenome working overtime for a while.  I also ordered Simplicity 4940 for a Halloween costume for myself,

http://www.simplicity.com/p-2201-costumes.aspx

New Picture (4)

I can’t decide between the Arwen dress and the Eowyn dress.

Now for the Jewelry items.  I haven’t been as busy with this as with the sewing.

I have started developing some items for what I am calling WM Bridal.  I started working with some sterling silver and fine crystal for some items, but also with silver plate and glass for bridal on a budget.  My own bridal set was silver plate and crystal.

Here is what I have come up with so far.   I would love some feedback, items that you like, and things that maybe could be better, or things you would like to see.

il_570xN.653652192_sk68 il_570xN.653650818_c589 il_570xN.653648590_cizm image_3


I also did a really neat up-cycled necklace out of different chains that I got from my Uncle whose father had owned a jewelry store, combined with beads that I salvaged from some old costume jewelry my Aunt gave me from her theatre group that wasn’t being used.

I really like the effect!


image_1

Well, I think that might be it for now.   I have lots of work to do this fall.  I can’t wait!

summer slow down

I haven’t done all that much crafting or sewing lately, and who can blame me. The weather has been wonderful, we have been spending our weekends working outside, redoing the deck, hanging out on a friends boat and watching the World Cup.  I also forgot to add photos of my completed items from the previous post.  oops.

I haven’t been completely idle in the craft department of course, I completed the mult-imeter case for my DH, and that was quite a challenge!

So the multi-meter is a hand-held device about the size of a large paperback novel, and has a number of attachments for measuring temperature and electrical current.

The first thing I had to do was to take all the necessary measurements, and then come up with a pattern that would work.  I spent a lot of time mulling it over before I applied scissors to fabric! The original design my DH and I came up with was to basically fold over a piece of the fabric and sew in a number of pockets, but once I sat down with the device and the fabric, I realized that it wouldn’t work because of the depth of the device, about 3″.   So I needed to rethink the entire thing, and this is what I came up with.

image (5)


A deep pocket for the device at the bottom of the case, and then a long flap above it with pockets for the attachments.

It has been a LONG time since I have had to add fractions together, but I had to do quite a bit of that for this!  I needed to make sure my seam allowances were included in my measurements.

The first issue I ran into was trying to get the device pocket to go together.  it had a front piece, a side piece to give it depth and these went together onto the main back piece.  Sewing curves is never easy and trying to do it with a thick and stiff fabric, was not going to work.  So the long side piece had to be re-cut as three pieces.   I had to trim a lot of the seam allowance off so that it would fold in nicely.

The rest when together fairly easily.  I even included a flap with a snap to hold the device in.  The attachment pockets went in quickly and I decided to put a flap over them so that they wouldn’t slide out.  Once that was finished I was able to install the strap and clip closure.

image (7) image (4) image (6)

My DH is quite happy with the results.


I spent a lot of yesterday in my craft room as well, most of the time spent sorting through all my amazing stash of old jewellery that my aunt brought me, and planning some cool upcycling projects! I have plans for making x-mas ornaments from old ornate brooches!

I have fairly large hands, and the kinds of bangles you can buy in cheap accessory shops don’t generally go over my hands easily or comfortably.  I have a ton of them anyways of course.  So the first thing I made was a wire wrap tree, with gold plate wire and labradorite chips, using a gold bangle as a frame.  I can see myself making more of these!

bangle tree


I also made an abstract one with various white beads as well.

That is it for now, folks.


My last sewing class, another productive weekend, and a challenge…and another disaster!

Well, last Wednesday was my last sewing class.  I can’t believe how quickly those 8 weeks went!  Not to mention how much I have created in that short time.

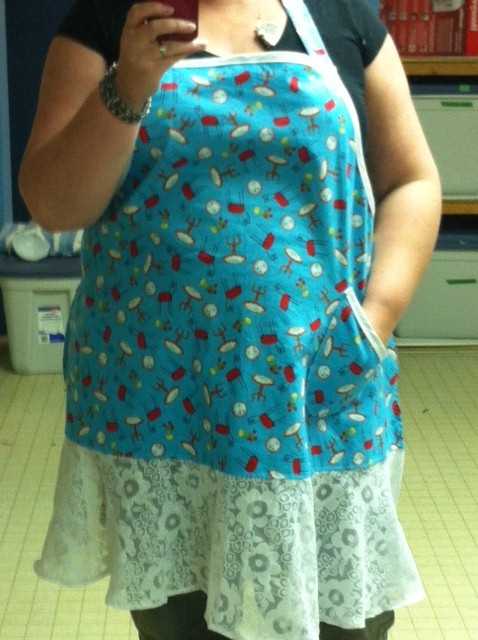
I didn’t want to start anything brand new so I took with me, the disastrous hot pink tank top and my Royal blue skirt from B3460,

B3460 which I had cut out and had completed the first couple of steps.


I wanted to see if my sewing teacher had any ideas for making the pink tank top fit me.   So we looked at it and she suggested putting in a number of pleats or tucks in the neck to pull it together both in the front and back.  I assumed I would do this with the machine, but after a number of false starts where the knit moved at the last moment and didn’t sew in properly, and then stabbing myself in the finger with a pin hard enough to require a band-aid, I figured it would be easier to do the pleats by hand.  So I moved onto the skirt which went together really easily and I am quite happy with the pockets.  I didn’t get a chance to finish the skirt before the end of class, but all that was left to do was the hem.

So this last weekend, I spend all my time in my sewing room,  surfacing only for meals.   So I finished the blue skirt.  Finished the green skirt and red capris.  I made another top from  M6927 view A, exactly like my Hawaiian print one, but in a fabric I had liberated from my mum’s stash.  It is a pale aqua with a pattern on it in white of stylized flowers.  I also completed M6551 View C, in a similar fabric to the one displayed on the website, oddly enough.  It’s a thick cotton with some stretch in it, with a white background and a dense pattern of red flowers in a sort of water-colour style.

m6551

I didn’t make the belt, because I ran out of fabric.

My only issue with this dress is that because the fabric is fairly stiff, the sleeves and the facings are a bit thicker and stiffer than I would like.  Still, it looks pretty spiffy on, though it is a little shorter than I was anticipating.

The last thing I did was to cut out M6899 View A, in a mid blue cotton.

I also convinced my DH to let me bring some chain maille up to work on while we watched the World Cup.  So I have been having a good time making a long rainbow chain in the full Persian style.  I haven’t decided what the final product will be yet.  The other thing I did last weekend was to measure a number of the earrings I have in my Etsy shop and updating my listings.

So that was the weekend, and sometime during, I decided to set myself a challenge for the coming week.  I would wear something I made everyday.  And I have done so!

Monday –  The new  M6927 (with rtw beige capris)  excellent office outfit!

Tuesday –  M1620 blouse in the white/blue floral with  B3460 in the Royal blue – LOVE this combo!

Wednesday – The red capris (which are more like shorts) that I doctored from M3056 (with a rtw white blouse) a bit frumpy but super comfy!

Thursday – M6551 red/white floral dress

Friday – M6927 in Hawaiian with rtw jeans as well as the matching earrings my pink full Persian bracelet

* rtw = ready to wear/purchased

Challenge completed!

Now for the disaster.  M6899 View A.

m6899


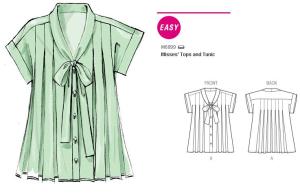
I had cut it out in a plain mid blue fabric, I should have used a pattern, patterns hide errors!   The pleats were tricky enough, and i wasn’t use to dealing with so many of them on one garment.  I also made the mistake of taking out the basting before I had completed construction, so that it was a lot of fabric to deal with.  This however was not where the whole thing “fell apart” as the saying goes.  The big trouble was with the collar.

First, I foolishly forgot to double-check the pattern and I sewed the collar to the wrong side of the shirt..dang it!

Second, it got accidentally snipped when I was removing the stitches.

Third, the sewing machine started having fits as I was trying to re-attach the collar (and somehow hide hole) because the thread had fallen off of the arm which at least was easy to fix once I had figured out the problem.

Fourth, could NOT figure out what the heck the button band and collar edge instructions were saying.

I ended up somehow having the button band I think folded over too many times, so that you couldn’t actually tie the collar properly.  It looks so crappy, especially with all the places the fabric has torn or frayed from sewing, un-sewing, re-sewing and re-un-sewing!   UGH.

So I shall now take a break from sewing for me, and get to work on my DH’s multi-meter case.  Assuming there is time this weekend, since we are rebuilding our deck.


P.S.  Sorry there are no pictures currently of the completed items, I will add them this weekend.


A Productive Weekend

It was the first weekend in a while that my DH and I didn’t have a lot of plans, so we got to devote our time to our various crafty pursuits.  For me of  course it meant spending every possible moment in my craft room.

When I got home from work on Friday I set to work on some seriously cute stuff for my niece Charlotte.

From http://mccallpattern.mccall.com/m6947-products-48426.php?page_id=487

M6947  I made View A, the shorter top and view G, the leggings.  Both in the same hot pink knit that I made that tank top out of for me.  My machine does NOT like that fabric!  My thread broke continually throughout the project, but I did finish it in the end.  I added three little white flower buttons on the top for decoration.

Charlotte outfit

I didn’t know this place even existed, but on Saturday after we popped in to visit my father-in-law so my DH could use his table saw, my DH took me to this place called Rockland Textiles.  They carried every shade of Gütermann thread available so I was able to get the green and red I need for my skirt and pants projects.  I also found a bunch of fun quilting fabric to make aprons for my next craft show.  We also found fabric for me to use for my DH’s multimeter case.

So I texted my mom to say, “did you know about this place?”  Not only did she know about it, apparently while we lived in Ottawa she used to work there on Saturdays and most of the fabric that made up my early childhood clothing came from there!  Who knew?

But I digress.

I also made my niece Top A from http://mccallpattern.mccall.com/m6022-products-10720.php?page_id=487

M6022

I used an adorable printed knit that is blue with white flowers with hot pink middles. It goes with the hot pink leggings perfectly.  It was a more challenging pattern than I have done before, but I really like how it came out!

Charlotte blouse 1

When we were at my Sister-in-laws house yesterday for a Father’s Day BBQ, I tried everything on Charlotte.  The hot pink tunic is a bit big, but she can grow into it.  The leggings fit quite nicely.  The blue top unfortunately is to big in the shoulders so it hangs down too low.  I thought I could just take it in at the shoulders, but then it would be difficult to get it onto her.  So I gave it a lot of thought throughout the evening, and I figured out what I will do.  I will unpick the shoulder seams, and refinish them open, then put a button-hole on the front side, and next time I see my niece I will add the buttons to the back so that  it is easy for her mum to get it on and off and it still fits properly.

Now, don’t think I ignored my own needs during all this.

My Aunt also gave me some great Hawaiian print of green leaves and pink flowers, that I think had been either a skirt or curtains or something in a previous life.  At any rate, the fabric is lovely and soft, so I thought I would use it to make http://mccallpattern.mccall.com/m6927-products-48273.php?page_id=101, which my mum had helped me to adjust for my fit when she was visiting last.  It is a great pattern!  It is super easy to adjust to the size you want, and includes different pattern pieces for different cup sizes, so that the darts are the right fit.  The pattern only goes to a 24, but I added an inch on each side from the waist to the hips to make a 28, I cut a 20 in the neck, a 22 in the shoulders and armholes, but moved from a 22 at the top of the armhole to a 24 at the bottom.

And it fits perfectly!

Hawaiian top I will absolutely be using this pattern again.  I love the way it is finished too.  The back is closed with a button and thread loop.  Fortunately I had a button that worked in my collection, but I had to look up how to make a thread loop on YouTube.  It’s fiddly.

So I decided to wear it on Sunday for the BBQ, and because it’s me, I decided that I needed a pair of earrings to match.

hawaiian earrings


So tonight I will tackle the top for my niece and finish cutting out http://butterick.mccall.com/b3460-products-3524.php?page_id=367

B3460


Sewing class, under-stitching and surgery.

I just got in from my second to last sewing class and it was a busy one!

I was ready to put the finishing touches on my black and white dress for Simplicity 3506.  All that I needed to do was add the facings in the neck, finish the arm-holes and the hem.

Of course, things never go as smoothly as one would wish.  First off, I had somehow left the bobbin cover to the machine at home, which meant that I had to tape a piece of cardboard over the hole.  Not an auspicious start.  The machine ran along smoothly though.  I ironed the interfacing onto the facing pieces and that went OK.  I pinned the facing in and that went OK too, so I sewed it in and pressed the facing down and then did what I thought the teacher meant by under-stitching.  I thought it meant that I put in a row of stitching close to the edge through all three layers, fabric, facing and seam allowance…nope.  What I was supposed to do was put a row of stitching at the edge of just the seam allowance and the facing.  crap.   So I added a second row of top -stitching so that it looks decorative.  I wasn’t about to unpick all that!  So then I  zipped up the zipper…double crap.

Somehow, one side of the zipper was half an inch higher than the other.  I guess I had pinned it in wrong and so the top of the zipper hadn’t folded properly.   So I had to unpick that side back a few inches, re-fold it so it matched the other side and re-sew it.  Thankfully, that turned out pretty well.

Now for the surgery part of the class.  As I was happily overcasting my seams, on the sides, my brand new machine started to slow down and then grind to a halt.  I tried to re-thread, checked under my make-shift bobbin cover.  Tried turning it off and on again.  Now even the manual wheel was stiff.  Something was VERY wrong.  So I decided to open it up, and once I figured out how to do that, I found that a large amount of pink thread had wound itself around a wheel in the arm of the machine that feeds the thread.  This was the result of the thread breaking so many times while I worked on the pink tank top.  So I carefully picked and pulled the wad of thread out and reassembled.  THANKFULLY, the patient made a full recovery and I finished the dress!

dress


Even having cut a 22 in the top, it is still a bit big.  I think I will cut a 20 on my next project.

And sometimes things go terribly wrong!

I have been hard at work sewing lately, although I took a quick break to go to the cottage.  So I only got some crochet done.  Go a weekend without some kind of crafting?  Yeah, NOT gonna happen!

Sewing classes have been going really well.  I have started working on the dress for

Simplicity 3506 and so far so good.  I cut out a 22 in the shoulders and gradually widening out to a 28 in the hips.  This was a great learning pattern for me, because it is the first time I have done any gathering, put in darts or installed a zipper.  Each thing took at least 3 tries.  But I am happy with it and it fits really well!   I still need to finish the seams, add the arm and neck facings and hem, but it should be done soon.

And that is the good news!  Now for the disasters!

So, from this pattern I also cut out the pants…and boy i should have cut a 26 with a 24 in the crotch, because when i tried them on, they were GIGANTIC!  sigh.  So last night I removed the elastic, and took it in a good inch on each side.  I am also going to use a draw string and elastic combo instead of just elastic, and make them capris instead of pants.  In the middle of this process I ran out of thread…

So you will remember the green skirt I had started from

Simplicity 1920 Well I finished it AND the belt and I was pretty happy with it I thought. But you know what?  It was also kinda big.  So I decided I would also take it in and instead of elastic, I would use the same elastic, draw-string combo as for the pants.  So I opened up the waistband and removed the elastic. I managed to rig up a tie with a piece of elastic in the middle and I took the skirt in a good inch on either side again.  But as I was trying to put in button holes (for the tie to go through), I ran out of green thread…*$^@#&*!!!

Breath SJ, breath!

So I had also cut out a plain tank top pattern in fuchsia knit.  I was being so smart, I cut out a 22 in the top and widened it out enough to fit through the bust and waist.  I started assembling it and so far, so good and then I finished the neck line and tried it on…AAARRRRGGGGHHHH @#&@$#&&#$&*$*#&%^%&@#&!

The damnable thing went almost halfway down the front showing an excessive amount of cleavage, and the shoulders were still too wide and the arm holes too small!

It was at this point last night that I decided it was time to go do something else.  So I did.

I have a couple of ideas for making it work for me, and adding some decorative elements…I might tackle that tonight, or just wait till the weekend.

So the red pants and the green skirt are on hold until I can get to Fabricland and get more thread (thankfully I kept the sticker with the colour code on it).  In the mean time I have lots of fabric to wash and items to cut out from my last trip to Fabricland from the weekend.  My Aunt who does costuming for a local theatre popped by on the weekend, with some great kids fabric for me, so I bought some patterns for my 4-year-old niece.   As well as a bunch of fabric to cut out more stuff for myself.  My DH also issued me a sewing challenge for a case for his, oh I can’t remember what it is called, but it measures electrical current or something like that. I wish I could book a week off work and just lock myself into my craft room!   I have an urge to make some chain maille too.  But of course the weather is so nice out, I like to spend as much time as I can in my garden.  Good problems to have 😉


A Slightly Tragic Occurance

I know it has been a couple of weeks since my last post. It isn’t for lack of anything going on however. I was keenly sewing away the week before last when the worst happened. The 25 year old Jenome finally gave up the ghost. The motherboard wasn’t in great shape by then, but it finally decided it had had enough. Right in the middle of working on a top!  Thankfully, my excellent neighbour came to the rescue and let me borrow her Singer, which was  until I got a new one.  Sadly, the top I was working on was also a disaster.  It should have been a simple v-neck sleeveless top in a knit.  But for some reason, which I discovered later, the top was huge in the neck and shoulders and fit perfect everywhere else…huh.  I had cut a 26 or a 28 , I can’t remember, but it did NOT fit.  SIGH!  So I might try to make something from it later, but for now it will sit in a drawer.  It was during this fiasco that my machine died, and I used my friend’s Singer to finish the hem and arm holes and then add some ill-advised darts…oh dear.  I did NOT take any pictures of it.

So after a long consultation with my mum and her best friend who was always like an aunt to me, both of whom are extremely accomplished seamstresses.  We decided that my mum and step-dad would come and visit for the weekend and mum and I would go shopping for a new machine.  Both my mum and Aunt Carol are Jenome users, and won’t buy anything else, so both recommended that I get a Jenome as well.   I had planned to get a fair amount of things done on Friday before they arrived, which I had off from work, but unfortunately I threw out my back on Wednesday morning.  I ended up spending a very painful day at work, and then didn’t actually manage to get OUT of bed on Thursday, although I did crochet a fair bit!  Still, My parents arrived on Friday afternoon, and Saturday, my mum and I went to the Sewing Machine Hospital on Merivale to shop for a new machine.  The Sewing Machine Hospital specializes in Jenome and Pfaff Machines.  I looked at the one my mum has, the Jenome 4120, but it was a lot more $ than I wanted to spend, and did a lot more than I really needed.  So I can home with a brand new Jenome 3160!


photo 3

Isn’t it Pretty?!  I couldn’t wait to get it set up and start using it, so I did!  I had cut out a number of projects during the week while my machine was out of commission.

I had visited the Fabricland in Kanata again and picked up more great fabric.

So I cut out Simplicity 1620 in a pretty white and blue floral cotton,  The top that is the same as the dress.

photo 1  I cut out a smaller size on top this time, and it fits a lot better!  What my mum and I discovered as we were going through my pattern collection and taking the necessary measurements, is that above my bust, I am about a size 22, and my back is even narrower.  My bust is somewhere between a size 24 and 26, and my waist and hips are a perfect 28.  This complicates matters when it comes to making a dress or top, however, we managed to work out how to adjust a couple of the patterns so that they will fit me perfectly!  So this top I cut out a 26 for the yoke, and a 28 for the body, but I made the pleats larger so that it would fit into the yoke.

My mum also showed me how to do seams in a much more finished manner.  I put in a row of stitching at 5/8″ and 3/8″ inches, and then trim to the 3/8″ line, then overcast the edges.

I also cut out Simplicity 1920 in a brilliant Kelly green!

photo 2  This is a perfect fit in a 28.  However, I can’t quite figure out the final instructions for the slit and the hem, so I am taking it to my sewing class on Wednesday for the teachers help.  This was Sunday evening and Mum was already on the road home at this point.  I cut the belt out in the same green fabric as well.

I have also cut out the pants from  Simplicity 3506 in a lovely red linen, but I haven’t started assembling these yet.  Maybe tomorrow evening.


The sewing adventure continues!

The dress is finished! It is not the neatest sewing job ever, and I will need to continue to practice. I did have trouble getting the bias tape in nicely, but managed it in the end. I also opted for a machined hem instead of hand stitched. Still, I am pretty pleased with the results.

20140510-204635.jpg

I am planning on wearing it tomorrow for Mother’s day brunch, which we are hosting. So I have been itching to get back to the Kanata Fabricland before it closes, and Mother’s Day was the perfect excuse, because of course I needed to make a new tablecloth for the occasion. Obviously.
So I got a lovely neutral floral.

20140510-205511.jpg

I also got, a heavy knit in both white and hot pink (3 metres each), a royal blue knit with embroidered white flowers (1.6 metres, all that was left) and a sateen knit in kelly green. Everything is washed, dried and ready to cut out. Table cloths are easy, fold, press, sew. So I figured I would also assemble the top in the blue wave patterned knit. Oh my gods, that fabric was a pain in the ass to work with! It was impossible to press the edges down so my hems and seams are all over the place. I also cut out a 28, and I really needed a 26, so I had to take it in and that was awkward. Still, as long as you don’t look too closely, it looks pretty cute.

20140510-210821.jpg

I also cut out a simple v-neck sleeveless top in the white before I figured I should ascend from my crafty cave.